WARNING: On all 617 turbo diesels and some of the later non-turbo engines a “ratcheting self-locking” tensioner is used. The older tensioners for non-turbo models are just spring loaded so you don’t have to take any precautions when installing these. The turbo ratcheting lock tensioner needs special attention when you install it. Failure to install this tensioner properly can lead to excessive chain and sprocket wear and possible chain failure!
Problem & Solution
Common among these chassis:
For a test to see how it works, go ahead and push the tensioner pin out a quarter of an inch. Now try to push it back the other way. You may be surprised to discover that it will not back up. (This is a safety design incorporated in turbo diesels that will prevent total failure of the tensioner from lack of oil or oil pressure). I am sure you are asking, “how do I back up the tensioning pin?” The only way to accomplish this is push the pin all the way out of he body and insert it back in the other end.
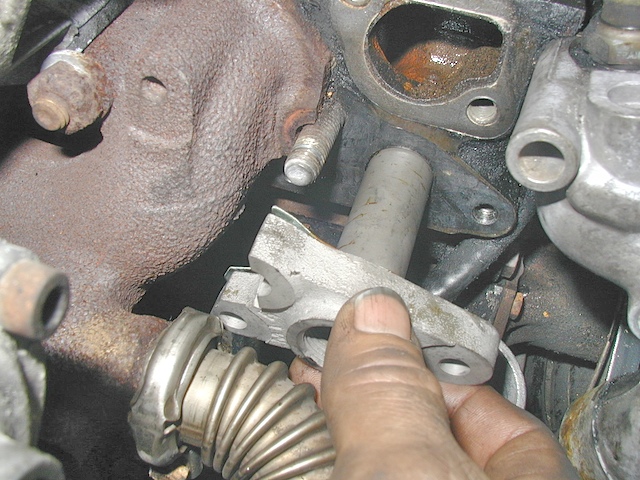
When removing and replacing a turbo chain tensioner you must follow this installation sequence. NEVER install the tensioner as a single unit. You MUST install it disassembled. With the tensioner pin and spring removed, install just the body of the tensioner into the cylinder head. Be sure to always install a new gasket and use aviation permatex on the gasket - no silicone please - to guarantee an oil leak free installation. Also, use thread locking compound on the bolts/nuts. You don't want your tensioner coming loose!!

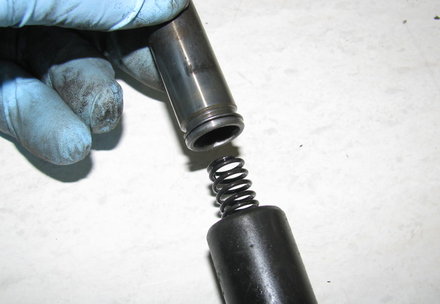
With the tensioner body in place, lightly coat the tensioner pin with engine oil and place it in the body. Use a narrow pin punch, insert it in the hole and push the tensioning pin all the way in until you feel resistance against the chain guide rail. Next, insert the tensioner spring and end cap and tighten securely. Use thread-locking compound of the end cap for added safety.
